I've been away for a LONG while due to weird and varied circumstances. Out of all the wonderful kitchen tools I used to own I am down to what could basically fit into a file box. I am truly back to basics. I own no electronic appliances but we refused to leave the molcajete behind.
Sourdough is on the rise. Brats and Butter Beans are for dinner tonight. I think I may make Pierogies tomorrow. All the old fashioned way. Pictures to follow.
Aunt Cranky's Kitchen
Getting Back to Basics One Recipe at a Time
Tuesday, January 17, 2012
Sunday, September 26, 2010
Trashy-Good Orange Crush Sherbet
It is impossible to describe how good this is. In the
background is the banana cake he will be eating with it.
Todd's favorite "ice cream" in the world is Orange Sherbet. I recently bought a Cuisinart ice cream maker and when I found this recipe at the Ezra Pound Cake cooking blog, I knew I had to try it. I ended up mistakenly using a large can of pineapple which made a little too much mixture for the freezer bowl, but I just put it into a container in the fridge to use when the bowl is refrozen. I'll try the original recipe next time but Todd loved all the pineapple in it.
Trashy-Good Orange Crush Sherbet
1/2 of a 2-liter bottle of Orange Crush
1 can sweetened condensed milk
1 small can crushed pineapple (I used a large can)
1. Combine Orange Crush, sweetened condensed milk and pineapple in a bowl.
2. Pour the mixture into your ice cream maker’s freezer container.
3. Freeze according to manufacturer’s instructions.
I added a fourth step to get a more firm sherbet. Pack into a plastic container, cover, and freeze for a few hours. Also, make sure your freezer bowl is solidly frozen (24 hours for mine).
This is really, REALLY good. I'm going to try it next time with Diet Sunkist soda so I can have more than a few bites.
Rebecca from Ezra Pound Cake says that this recipe is also good using different combinations of fruit flavored sodas and fruit. I'm thinking Strawberry soda with chopped banana next time.
Wednesday, August 25, 2010
Avocado Sauce
What's left of dinner (and will be gone by bedtime).
I've been a bit under the weather the past few days and me and solid food were not getting along. When I finally got my appetite back tonight, I wanted my ultimate comfort food meal: Taquitos and Avocado Sauce from my childhood. We used to get them from Tastee Freez and a few other walk up places in Southern California. Our local Latin market had frozen Taquitos on sale last week and I bought a couple of big boxes. In a fair distribution of labor in my marriage, I made the sauce and he manned the deep fryer. There are a few ways to cook frozen Taquitos following the directions on the box. I made up the sauce based on what I thought might be in it and it was really good. If you make small batches of sauces and dressings, I suggest you invest in a mini food processor. I got mine a few years ago at Wal-Mart for around $7 and it is really easy to clean.
Avocado Sauce
1 small Mexican onion bulb (or regular onion piece a little smaller than a golf ball)
1 large seeded jalapeno
3 Tbsp. cilantro leaves
1/2 tsp salt
1 small avocado peeled and seeded
2 heaping Tbsp. sour cream
1 tsp. white vinegar
Place onion, jalapeno, cilantro, and salt in food processor. Grind together until very fine. Add remaining ingredients and process until smooth. I like mine thicker but you can add small amounts of water or milk to get it to your preferred consistency.
This made enough to generously accompany 8 Taquitos (with a little to dip my finger into later).
Thursday, August 12, 2010
White Bean and Chorizo Chili with Mexican Rice
Chili served over Mexican Rice, topped with melted Monterey
Jack cheese and sour cream. Lots of Green Tabasco for Todd.
We love chili but I have gotten into a rut making my ground beef based Texas style red chili. I'll probably make a batch soon to keep in the freezer for chili dogs (or I may try canning it). For this recipe I wanted to do something a bit different using only ingredients we had on hand. We're on a strict budget after Bugg's visit and our 2 mini vacations. This recipe can easily be doubled, tripled, etc. for a crowd
White Bean and Chorizo Chili
(6 servings)
1/2 lb. small white beans picked over for stones
5 cloves pressed garlic
1 small onion semi-finely chopped
3 cups water set aside
1 cup green salsa (I used homemade I had on hand but store brand is perfectly fine)
1 roll or large link chorizo sausage
1 medium diced fresh ripe tomato (leave in seeds)
1/2 cup finely chopped cilantro leaves and stems (optional)
1 tsp. salt
Soak beans over night in a lot of water. In the morning, drain and soak in fresh water until preparation time.
Drain beans and add to large pot. Add 4 cloves of the pressed garlic and the chopped onion. Cover with water about 1/2 inch, bring to a boil, then lower heat to a simmer. Add remaining garlic to reserved water. Check beans after 30 minutes to check water level. Add small amounts of garlic water to keep them from drying out as necessary. After 1 hour, add green salsa and more garlic water if necessary.
Remove chorizo from casing and fry until cooked through breaking up any lumps. It should resemble a paste. Add to beans, stirring well. Simmer until beans are to desired consistency. Add tomato, cilantro, and salt. Simmer for 5 more minutes, then shut off heat. You will end up with this:
It's tastier than it looks.
I learned how to make Mexican Rice 18 years ago from my children's Nanny who was originally from Mexico City. She would make up a batch once a week and leave it in the refrigerator for me. The kids loved it. The garlic is my personal addition. We like garlic.
Mexican Rice
This makes a lot
2 cups dry white rice
4 large cloves pressed garlic
1/2 small onion finely chopped
1 large fresh jalapeno seeded and very finely minced
1/4 cup vegetable oil
1 small can tomato sauce
Water to make 4 cups when added to tomato sauce
1 tsp. salt
1 medium ripe tomato seeded and diced small
Heat oil in large sauce pan. Saute garlic and onion for 1 minute. Add rice and coat with oil. Cook stirring constantly until grains start to look slightly translucent. Add jalapeno, tomato sauce, water, and salt. Cover, bring to boil, them turn down heat to medium low. Simmer without stirring until rice starts to dry out. Stir in tomato and cook until just wilted. Remove from heat and let sit covered for 10 minutes. Remove cover and fluff with fork.
This is actually leftovers from the weekend's Cheesy Mexican Chicken recipe soon to be posted.
Thursday, July 29, 2010
Pasta a la The Bugg
My 14 year old daughter known as Bugg is visiting from Houston for a few weeks. I'm a firm believer in teaching children life skills from the moment they can reach the controls of the washing machine while standing on a step stool. Manning a stove needs to wait until they are about 9 years old (with supervision). We are leaving for a short vacation tomorrow morning so this week's trip to the store was unusually small and I had to forage in the freezer for meat. She doesn't eat red meat so I had to choose between fish or chicken breast. Chicken it is.
I asked her how she wanted it prepared without informing her she would be doing the heavy lifting as a Hallmark style warm hearted learning/bonding experience (cue the violins). She asked for pasta in "some kind of sauce". Well that narrows it down. I surveyed what was left in the frig and came up with the following. Don't be frightened - it's easier than it looks. Other than me giving a few technique tips, The Bugg did this on her own.
Pasta al la The Bugg
1 box Penne Pasta (we used Dreamfields 13.5 oz - lower glycemic)
2 lbs. boneless skinless chicken breast cut into small cubes
1/4 cup olive oil
3/4 stick of butter
1 small white onion finely diced
5 cloves pressed garlic
1/4 cup finely chopped cilantro stems
1 medium tomato roughly diced (leave in seeds)
1-1/2 cups whole milk
1/2 lb. shredded mozzarella cheese (I use El Mexicano brand which is softer and creamier)
1 tsp. Lawry's Seasoned Salt
1/2 tsp. coarsely ground pepper
1/4 tsp. ground nutmeg
2 Tbsp. salt for pasta water
Cook the pasta according to directions and drain. You want it slightly al dente as it will cook for a bit more later.
Heat a large skillet on high until very hot. Add olive oil. Add chicken pieces and fry constantly stirring until all the pink color is gone. Stir in Lawry's Seasoned Salt. Cover and continue to cook on medium heat for 5 minutes. Offer proof to your OCD child that the meat is cooked through by cutting piece in half. Using a slotted spoon or spider, transfer to the pot of cooling pasta.
Add butter to oil and watch child scream as it splatters a bit. Heh. This is more fun than it sounds. Once butter is melted and combined with oil, add chopped onion. Add garlic. Add cilantro. Cook until all is soft and add tomato. Stir in milk and heat until bubbling. Add cheese and stir until melted and combined to a smooth texture. Add pepper and nutmeg. Cook until slightly thickened.
Pour all of the sauce into the pasta pot and cook on low until the pasta has absorbed most of the sauce.
Turn off heat and let rest for about 5 minutes. Serve and listen to the groans of pleasure from the recipients.
The Bugg sauteing while Todd finishes chopping the tomato
because I nearly took off the end of my thumb in the process.
Sunday, June 20, 2010
Homemade Tomatillo Salsa on Pepper Chicken Tacos
My husband Todd could eat Mexican food every day. Three times a day. Maybe more. We have an authentic Latin market a few blocks from us and decided to make an investment in some kitchen tools usually specific to Mexican cooking. We have purchased a molcajete, a tortilla press, and since making this meal a comal because I nearly killed a very expensive Le Creuset skillet cooking tortillas. If you decide to purchase a molcajete, make sure you do internet research on how to find the correct kind and prepare it for use. A husband with really strong arms and the patience of a saint will also be helpful. The molcajete gives salsas and guacamole an indescribably wonderful texture from the food being ground rather than cut with a blade. If you do not have the fortitude for this venture, break out the food processor, blender, or stick blender. It will still taste good.
This meal is a multi-step but easy process and well worth the time. This is an instance where, except for the tortillas, there really is no set recipe. Use similar ingredients available to you and/or what you have on hand. We're going to focus on proportions today.
Chicken with Peppers and Onions
Meat
For every pound of chicken, beef, or pork, I use:
1 large Poblano Pepper
1 large Red Bell Pepper
1 large Anaheim Chile
2 Serrano Chiles
1 large White Onion
1/2 tsp. salt
Remove stems and seeds from peppers and chiles and roughly chop. Roughly dice onion. Cut meat into 1 inch cubes. Place all ingredients into a dutch oven and cooked covered at 325 degrees (350 high altitude) for two hours. After 2 hours check to make sure the meat shreds. If not keep cooking and checking at 20 minute intervals. Once done mix well with a large metal spoon, chopping as needed with the side of the spoon. Set aside or refrigerate if you make this the day before.
Roasted Tomatillos, Peppers, and Chiles
Roasted Tomatillo Salsa
For every dozen tomatillos I use:
1 large Poblano Pepper
2 Serrano Peppers
2 large Anaheim Chiles
2 large Guerito Chiles
Roast the vegetables in a pan while the meat is cooking. Remove when the tomatillo juices turn dark brown and the skin starts to separate from the chiles and peppers (20 - 30 minutes). Cool. Remove skins, stems and seeds from chiles and peppers. Roughly chop everything and set aside.
Really blurry garlic cloves
Grind 4 cloves of whole peeled garlic into the molcajete until a paste.
Add:
1/4 cup chopped Cilantro (per above proportions)
Grind until garlic and cilantro are fully combined Add roasted vegetables and grind until the whole mixture becomes salsa consistency. You can do this in small batches and mix together in a bowl.
Refrigerate.
Fresh Corn Tortillas
Tortillas
Buy a bag of Maseca brand Masa Mix (or whatever is available)
Follow directions for however many tortillas you want
Form dough into a ball, wrap in plastic, and set on the counter for at least 30 minutes. This is very important because the water needs time to incorporate and soften the dough.
Heat a cast iron pan to medium high. Don't use your very expensive Le Creuset.
Form dough into golf ball sized balls one at a time just before you press them. Press between 2 pieces of plastic wrap.
Cook on dry skillet on each side until just starting to brown.
Repeat until all the dough is used up.
Tacos
Place warm meat filling and some salsa in tortilla and eat. You can bastardize them with cheese, sour cream, etc. if you want but it is absolutely not necessary. These stand on their own.
Wednesday, June 2, 2010
And now for something completely different: Cheesecake!
I purchased an individual cheesecake pan and a mini cheesecake pan from the Cutlery and More website recently. It appears they no longer carry the mini pan. Boo. I made the individual size for Todd and the minis for the shop. The pans have flat removable bottoms which allow you to simply push the cakes up from the bottom and I am not kidding when I say these pans are non-stick. The straight sides make for more even cooking. I am going to experiment with using them for muffins and bread rolls. If you can't get this kind of pan, use standard and/or mini muffin cups lined with cupcake liners
1 lb. Cream Cheese at room temp (I buy the 3 lb. blocks at Sam's Club)
1/2 C. Sour Cream
3 Eggs
1 C. Sugar ***
1 Tbl. Lemon Juice
1 tsp. salt
1 sleeve Maria's Cookies (in hispanic section of grocery store)****
1 stick melted butter
I used my mini food processor to grind the sleeve of cookies, stirred in the melted butter well, and set aside to soften up a bit.
The rest of the ingredients were put into mixing bowl and combined with an electric mixer until relatively smooth. Tiny lumps are okay.
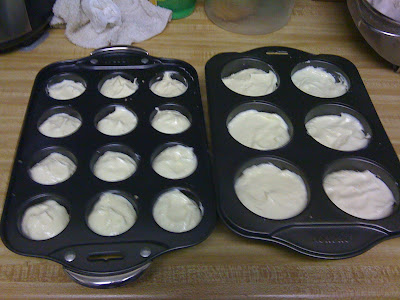
The cookie mixture was then divided among the cheesecake pans to form a solid layer that was then tamped down.
Then the batter was divided between the pans.
Bake in a preheated 350 degree oven (I adjusted to 365 for altitude). The minis took about 20 minutes and the individuals took close to 30 minutes. You want the tops to be set but not brown. Adjust time as necessary. Remove from oven and cool in pans until just warm. Use a skewer if needed to loosen any browned clinging sides. Push bottoms straight up and remove the cakes. The bottoms should remove from the crust extremely easily. The final product is the picture at the top. Don't be upset if the centers cave in a bit. That just gives you a well to fill with fresh fruit, whipped cream, melted jam, or whatever catches your fancy!
*** For a low carb cheesecake, substitute the measure to measure powdered Splenda. I use Whey Low, a low glycemic sugar substitute I get online. I looks, tastes, and reacts like sugar and has a low glycemic load. It is apparently available at Whole Foods now. The website carries granulated, brown, and powdered sugar varieties, among other products.
**** Substitute crushed almonds or pecans for the cookies for a delicious (and decadent) low carb substitute.
Subscribe to:
Posts (Atom)